
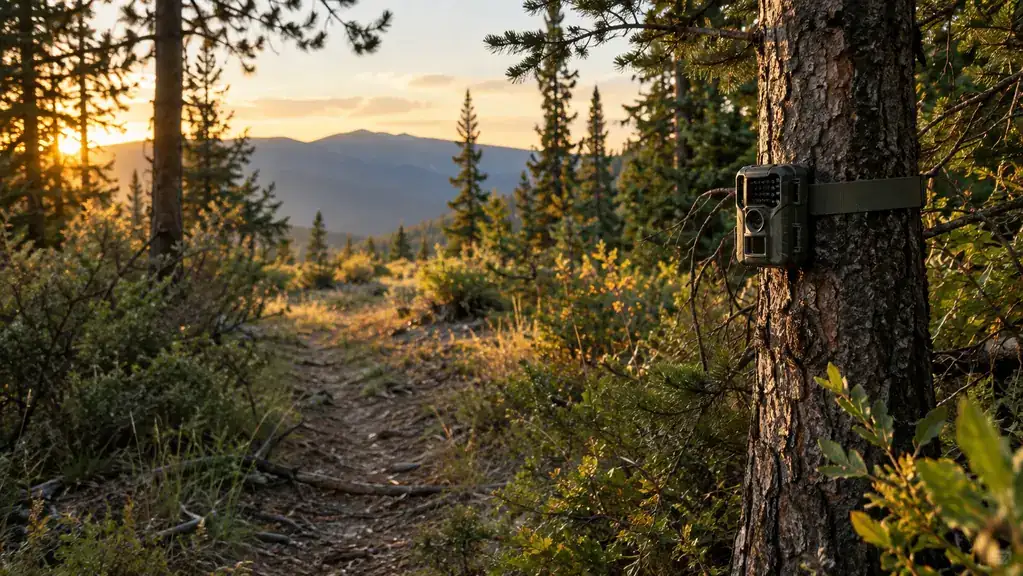
There are two ways to hunt a piece of public ground in October. You can burn boot leather covering the same benches and drainages you always cover, hoping the deer are where they were last year. Or you can know where they are, because you watched them a few times a week since late summer. I have done both. The first way is how I hunted my first several seasons, and it cost me miles and more than one tag. Now I put a pair of WOSODA trail cameras out about a month before the rifle opener, and they cover the country while I am at work. When opening morning finally gets here, I am not hunting a guess. I am hunting a pattern, and that pattern is worth more than any boots I have ever owned.
Getting a camera hung is simple. That is not the part that separates a useful setup from a thousand pictures of empty grass and squirrel noses. The part that matters is the thinking beforehand: which tree, what height, what angle, what settings, and how to check the card without turning your best spot into a human intersection. This is the order I work through every late summer, and it has held up on mule deer and elk on public land for longer than I care to count. Even after all these years, I would rather hang two cameras well than six cameras wrong, and this method is how I do that.
Put eyes on your hunting ground for weeks before you put boots on it.
The WOSODA two-pack covers two places at once, so you can watch a feeding edge and a pinch point without buying a second camera. It is a simple way to learn a piece of country before the season opens.
Amazon Check Today's Price on Amazon →Step 1: Walk the ground first. Hanging the camera comes last.
The camera does not decide where to hang. You do that with your own boots before you carry a camera in. I spend a couple of mornings on the piece I am hunting, and I am not walking the main trails. I walk the edges: the bench above a meadow, the saddle between two drainages, the spot where a rim or a thicket pushes deer into a narrow lane. I am looking for places deer have to pass, not places they might wander past. A deer will forgive a lot of disturbance once, but it will not forgive a ridge that smells like people twice.
Then I read the sign as if no camera was coming. Fresh tracks in damp dirt, droppings that are still dark, a bed under a juniper with hair in the bottom of it: that tells me what is using the area right now. A rub line from last hunting season tells me what was here in November. On public ground, the deer that make it through the season are the ones that changed their habits, so current sign beats old sign every time.
Pressure decides the final tree. I do not hang a camera in a spot where another hunter is likely to walk through, because cameras walk off and batteries disappear. A hundred yards off the main trail, on the back side of the ridge, gets me the same pictures without advertising my spot to every truck that parks at the trailhead.
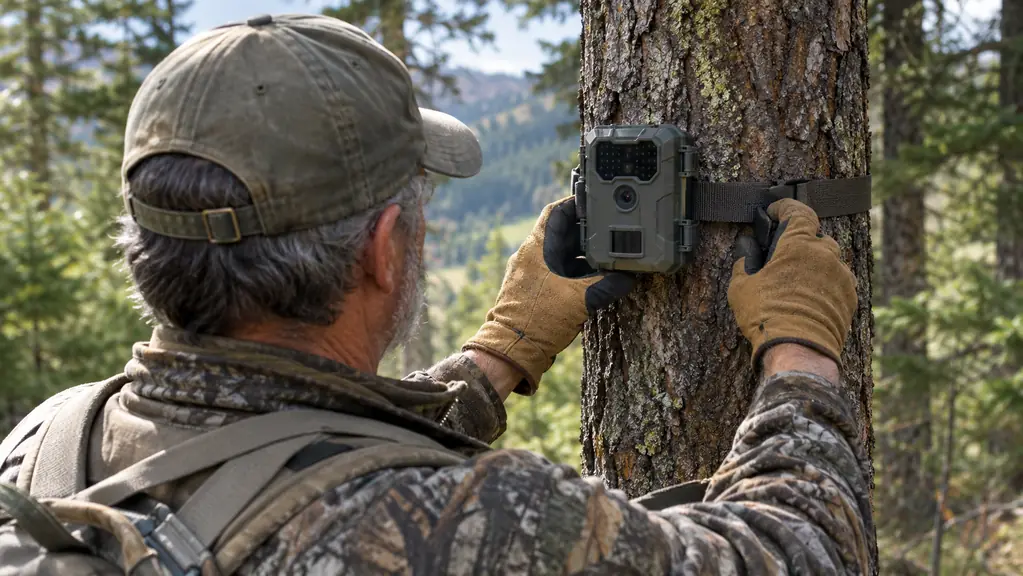
Step 2: Hang it at shoulder height and aim down the trail.
I hang most cameras so the lens sits three and a half to four feet off the ground, about where a deer's shoulder is. At that height the body of the deer is in the trigger zone, so the camera fires when it should. Higher looks like better coverage, but you get a photo of a back and the top of a head, and you miss the angle that tells you the size of the buck you are chasing. Body shots are what age a buck honestly.
Aim is the detail most people skip, and it is the one that fixes the most bad photos. I point the camera down the trail, not across it, so a deer walking in comes toward the lens and gives you a clean look at its chest and antlers as it passes. Aimed across the trail you get a blur of legs. I also tilt the head down a couple of degrees so the field of view starts ten feet in front of the tree instead of out at the far ridge. That one angle change cuts way down on wasted sky and swaying branches.
Make sure it is snug. A camera that shifts in the wind false-triggers all night and fills a card with nothing. Tension both straps so the head holds level when you let go, then give the camera a little shake and see if the picture is still going to be steady. If it has a test mode, and the WOSODA cams I use do, set it and walk the trail in front of the lens. You should see yourself trigger the camera at the distance you expect the deer to cross.
Step 3: Clear the foreground and keep the sun out of the lens.
The fastest way to burn through batteries and card space is a blade of grass moving in front of the lens. Before I lock a camera down, I clear the lane between the lens and the spot where the deer will walk. Pull the tall grass, trim the branch that hangs over the trail, cut the sapling that will whip in the wind. You want fifteen to twenty feet of clean ground between the camera and the animal, with nothing small and close to the lens to trip the sensor.
Then think about the sun. A camera aimed straight east faces right into sunrise, and every image from first light is a white blur. The same thing happens in the evening with a camera aimed west. I prefer to aim a camera generally north or south along the trail. When the trail only offers a tree that faces the sun, I move around to the back side and aim at an angle across the trail, so the sun stays out of the frame. An angled shot you can read beats a head-on shot that is washed out for two hours every morning.
I also think about access when I pick the tree. A camera that takes good pictures on a ridge you cannot reach without crossing the deer's bedroom is not helping you. I look for a route in that stays below the skyline and out of sight, and I hang the camera so I can check it in ten minutes without circling the whole basin to get to it. Ease of access is part of the setup, not an afterthought.
Three mornings in a row, the same buck crossed the same deadfall at the same hour. That is not luck. That is a setup working the way it is supposed to.
Step 4: Set the camera for the spot you chose.
Out of the box, most trail cameras are set to take a long burst of photos any time something moves. That setting burns up a card in an afternoon where deer feed across a meadow. On a pinch point, where a buck crosses in three steps, that same burst is exactly right. I run mine on a three-shot burst with a short pause between triggers. It catches a buck walking through and keeps one doe from filling the card.
Set the date and time before you hang it, and set it right. A photo without a correct time tells you a buck is using the trail, which you probably already knew. The time is what turns that photo into a plan: if he crosses between nine and ten in the morning and you know it three weeks before the opener, you know where to sit.
If your camera has a time lapse setting, use it on the open spots. I run a photo every ten minutes over a meadow edge during daylight. It does not replace the motion shots; it adds to them. Deer that are feeding slow and easy may not trip the motion sensor the way you want, but a time lapse shows you the hour they are on their feet. That is the piece of information that decides where I am on opening morning.
Step 5: Lock it down and check it without leaving sign.
A camera with a cut strap is gone, and on public land that happens. If the camera came with a steel security bracket, use it, and put a cable lock through the bracket and around the tree. Pick a tree thick enough that a saw is the only way to get it off. Set the camera on the side of the tree that faces away from the road and away from camp, and low enough that it does not catch the eye of every hiker who walks by. The point is not to stop a determined thief with a saw. It is to make yours the easiest camera on the ridge to leave alone.
When it is time to check it, the deer are the ones watching you. I walk in from downwind and stay off the trail itself as much as I can. I wear rubber gloves when I handle the camera and the card, and I touch the tree as little as possible. Deer do not care about a plastic box on a trunk; they care about the smell of a person hanging around their bedroom. Keep the visit short, do not stand there reviewing every photo on the screen, and get out.
I check a new setup after about a week, just to confirm the camera is firing and the angle is right. After that I let it run for two weeks if nothing has changed the equation. As the opener closes in, I check it more often, because the deer shift their paths as soon as the pressure starts. The card I pull the weekend before the season is the one that tells me where to be. That final week of information is the reason any of this works.
What Else Helps
A few small habits keep the whole system running. Format your cards in the camera before you use them, not in your computer, because that keeps the file structure clean and cuts down on card errors deep in the season. Put fresh batteries in at the start and carry a spare set in the truck. Cold mornings drain every camera battery a little faster, and a long walk in to change batteries you could have changed at home is a poor use of an afternoon.
Keep a log of where each camera hangs. I drop a pin at each tree on the map app on my phone and write down the date I hung it and the angle it faces. A year later, when the landmarks all look different and a foot of snow covers the ground, that note is what keeps me from walking past a camera I spent an afternoon setting up.
Do not overdo it. One camera on the right pinch point tells you more than five cameras scattered across a hillside. I split the WOSODA two-pack between the best funnel I found and a feed edge half a mile away. That pair has told me more than any five cameras I ever set out in a hurry.
Finally, make the camera part of a plan. When I pull a card, I look for patterns: is the same deer showing up at the same time, moving the same direction? If a camera shows nothing for two weeks, move it. A camera on a trail deer are not using is just a stick with a lens, and moving it costs you nothing but a walk you were going to take anyway.
Let the deer tell you where to be.
The setup does not have to be complicated. Hang it where the sign says to, aim it so the pictures come out clean, and let it run. The WOSODA two-pack I use has gone through a wet season and a dry one without missing a beat, which is all I ask of gear that rides in the bed of my truck all fall. Check today's price on Amazon and get it running before the deer settle into their autumn patterns.
Amazon Check Today's Price on Amazon →